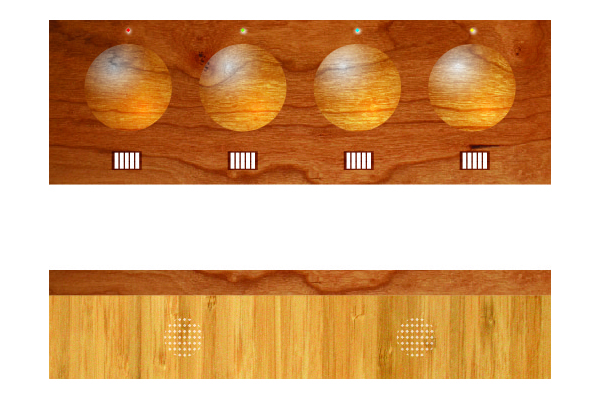
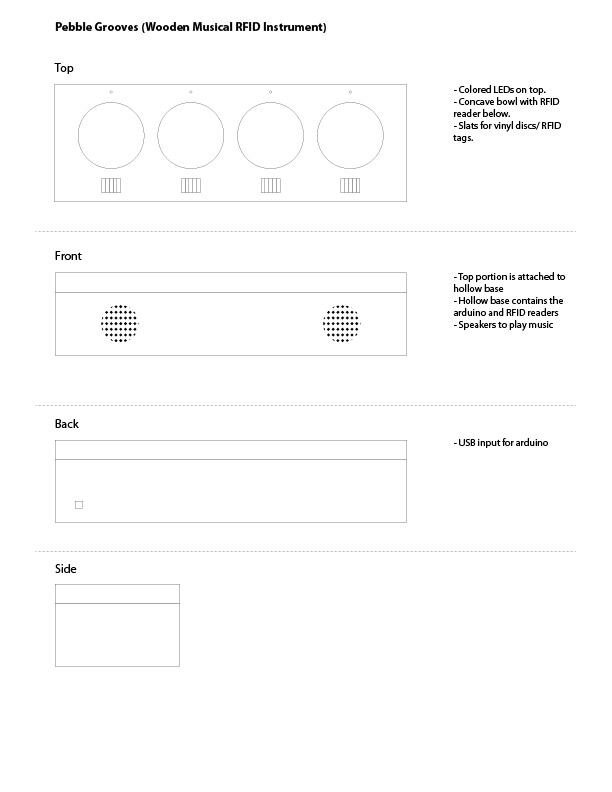
The RFID Beat Box is a instrument that allows a user to create and play music by placing RFID tags into wooden bowls. The tags, designed as small vinyl record discs, are labeled by color and each tag/disc activates a unique sound. The top of the instrument has four wooden bowls, each labelled by color to indicate a certain instrument/musical type (drums, guitar, bass and synth loops). The user can place the tags/discs into the bowls to layer and experiment with the different musical options. We also incorporated colored LEDs that blink to the music when a disc is placed into the each bowl.
Author: danne
Beat Box Progress
So over the last week we have made some great progress on our Beat Box. We got the wooden top purchased from a lumber yard in Woodstock, NY, you can see my buddy Chris in the above photo cutting this gorgeous piece of Mahogany down to size for me. As for the size of the box I am going back and forth between having everything wooden or using plexi to reveal the technical side of the piece. I really like the idea of having a nice natural piece of wood for the lid and having the technological side revealed below it for contrast, but I can also see the reason for keeping all that hidden and more of a mystery.
I have been toying around with RFID readers and tags and figured out how to attach a different musical loop to each of the 24 RFID tags, using the Minim library in processing to play the loops and just having the tags mute and unmute each loop when placed close to the readers, thus allowing everything to stay on the same beat. Below is a video showing this in action.
I have also figured out how to have a LED blink to the beat of whatever loop has been selected using the FFT (Fast Fourier Transform) code in the Minim library which is communicating with the Arduino. Below is the video.
Beat Box
Beat Box is a project that Stefanie Kleinman and I have conceived and are in the process of creating. It takes the idea of musical composition and brings it back into the physical world rather than staring at a computer screen. We decided to use RFID technology and use each tag to turn on and off certain musical loops. There are 4 concave bowls cut out of a wooden block. Underneath the block are 4 RFID readers connected to a arduino and in turn connected to a computer. Below the bowls there are 4 compartments containing 5 quarter sized disks made from vinyl records. Each disk has a RFID tag that triggers either a drum, guitar, bass or synth loop in either GarageBand or another music program when the disk is placed in one of the 4 bowls. There is an different color LED above each bowl that are color coded to each tag to represent the type of loop that will play. When a tag is placed into a bowl the LED will go from dimmed to 100% brightness to indicate that it has been activated. Below are the tech specs for the design.
Musical Bouncing Balls
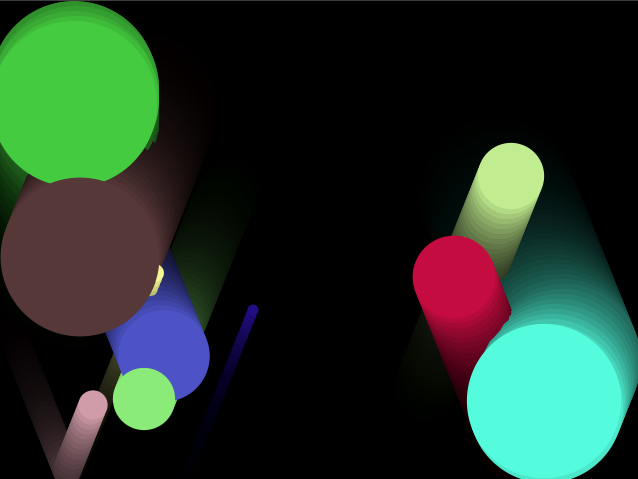
For my Intro to Computer Media midterm I wanted to do something with collision detection and audio. With this as my general goal I started playing around with bouncing balls and turned that into a drum machine like application. Whenever a ball crosses the center point of the screen 1 of 10 audio tracks will play depending on where the ball crosses along the x-axis of the center point. You can click to add more balls to the mix and create beats. I also tried to program the arrow keys to control the speed or tempo of the balls, although I did not succeed with that I accidentally figured out how to turn gravity on with the right arrow, pause everything with the down arrow, flip gravity with the left arrow and turn off gravity with the up arrow. Gotta love happy accidents. Below is a link to a javascript version of the application along with two version of the application for download, the first is more rhythmic and the second is more abstract and random. Enjoy!
Musical Bouncing Balls – JavaScript
Confetti Wall of AWESOME
For our physical computing media controller project Inessah, Amik and I decided to create a confetti machine where the user can control the height of the confetti by raising and lowering their hand. We first tried using a DC computer fan with a ultra sonic sensor which worked perfectly for controlling the speed of the fan based on the distance of your hand but it soon became clear that a 12 volt computer fan wasn’t at all powerful enough to blow a large amount of confetti more than about a foot.
Once we realized we needed a fan upgrade we went down to a industrial fan shop on Canal street and picked up a hefty 120 volt AC fan. After purchasing said fan we found out that in order to control it with the Arduino we needed to use a relay because you cant have AC power running directly into the micro processor. A relay basically is just a on and off switch controlled by the Arduino. Because we are only able to turn it on and off we lost the ability to control the speed. But our professor Tom Igoe had a great suggestion of pulsing the fan at different intervals to replicate a change in speed.
Once we had control of the fan we started working on designing and constructing the container. Working with wind was much more difficult than we originally anticipated the container we designed was wider at the bottom and became narrower at the top of the base to try to focus as much of the wind into the confetti container. We also ran into the issue of static electricity, most of the confetti ended up sticking to the sides of the container. To remedy this we wiped the interior down with anti-static computer screen spray, this seemed to help things significantly. Another later addition to the box was to make the bottom opening where the fan was blowing into smaller and more focused. All of these last minute tweaks improved things but I am sure we can improve upon this and make it even better down the road.
Array of Balls
This is a project testing the array and loop features in processing. Every time the user clicks the screen a new bouncing ball is created. See it in action here.
Knobs and Computers
So this week for our lab in P Comp we are having fun with knobs and laptops, aka potentiometers and controlling Processing through the arduino. Below is an image of the arduino with the potentiometer connected to it and below that there are two videos that were created while I was controlling Processing with the potentiometer. Click and watch the purdy colors.
The Asshole
For our video and sound final film we were inspired by the stereotypical new york asshole who just doesnt give a crap about anyone else but himself. Watch the short film below to see what happens when your a dick to everyone around you, what goes around…
Snow Arduino
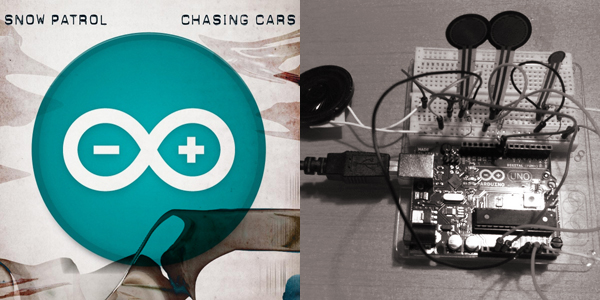
So for our Intro to Physical Computing class we learned how to make simple tones and notes using just the arduino. I attached three pressure sensors to communicate with my laptop and output a note to the attached speaker. To make things a little more interesting I decided to play a song. Rather than choosing something like Old McDonalds or Happy Birthday, I opted to choose something a little more current. So below is a video of me playing along to Snow Patrols Chasing Cars. Im not a huge personal fan or anything, but hey its only three chords and crazy easy to play. Enjoy Snow Arduino, haha, god Im such a nerd.
ServoBoarding
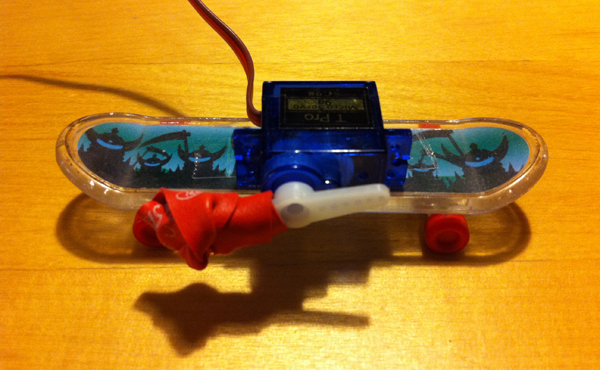
This is a test using servo motors and the arduino. A pressure sensor is hooked up to a servo motor which is attached to a finger board. When the pressure sensor is pushed the servo motor acts as a leg (or finger) and scoots the board across my dining room table. Ok so it only goes about 6 or 7 inches but its not the distance it goes its how well it works, ha. Video below.

